For a long time the AMC show “The Walking Dead” was a favorite of mine. The first episode with Rick Grimes waking up in a hospital bed and thrust into the middle of a zombie apocalypse was love at first site.
My wife and I were such Walking Dead fans that we even watched the after-show/talk show called “Talking Dead,” hosted by Chris Hardwick.
While most can imagine the gist of “The Walking Dead” shows and its spin off “Fear the Walking Dead,” the concept of the talk show that follows called “Talking Dead” is a little harder to understand. It is basically a talkshow that recaps the most recent episode, talks with fans, actors and producers, helps fans to cope with the craziness that may have taken place during the last episode, and takes questions from viewers.
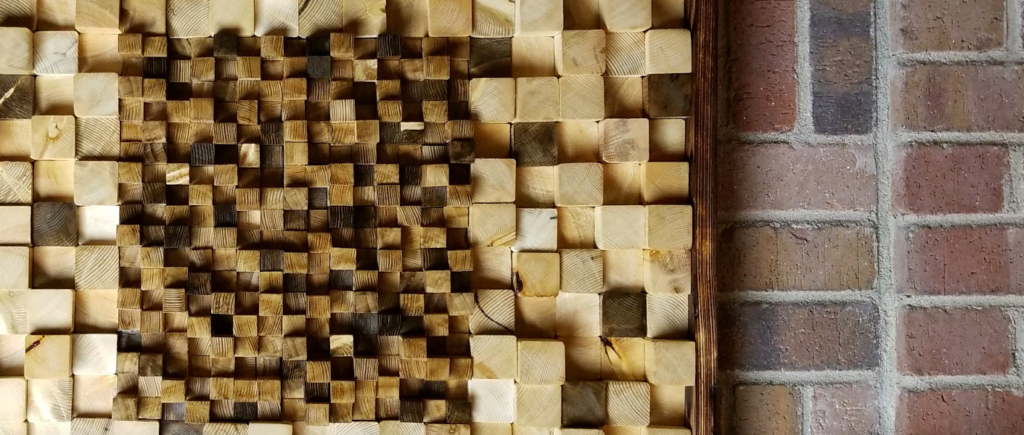
What really captures my attention when watching the “Talking Dead” is the wooden wall art they have hanging in the background. Without fail, this piece of wood art just pops out at me and for years it begged me to recreate it in my garage.
I searched the internet for a good set of instructions and came up empty handed. But after examining the artwork as best as I could from the various episodes I watched, I was able to put it together.
At the time of making the Talking Dead wood wall art, I was not planning on making DIY instructions, otherwise I would have taken more pictures and videos.
Making this piece is very similar to making an end grain cutting board or a Nintendo pixilated art piece. It does not require nearly the precision of the end grain cutting board because the differing lengths of the pieces that creates the 3d effect will hide little gaps and imperfections.
DIY Talking Dead inspired wood wall art
Tools Needed:
Miter Saw and/or Table Saw
Sander
Strap clamps (optional)
Only two basic tools are needed for this project. You will need a tool to make straight cuts (a lot of cuts!) and a tool to sand the blocks. Cutting all these blocks out by hand is really impractical and a circular saw would be too unwieldy to cut across the smaller strips of wood. If you do not have a miter or table saw, another option that could work would be a jig saw.
Materials Needed:
Wood Strips 1″x1″ (here are examples from Amazon and Lowes)
Wood Strips 2″x2″ (unfortunately, lumber in true 2″x2″ with squared edges is very hard to find, see below for further discussion)
Wood Strips 2″x1″ (for the frame)
Plywood for backing
Wood Stain
Wood Glue
Picture hanging hardware
Spray on finish
Wood strips in an actual 2″x2″ dimension is very hard to find. Most wood labeled 2″x2″ is actually 1.5″x1.5″ and with rounded edges. For this piece, make sure to have squared edges. If you want to keep true to the dimensions of the project, you will have to use a table saw to make rip cuts to get actual 2″x2″ strips. If you don’t mind having the proportions a little off and want to save time or you don’t have access to a table saw, use the 2″x2″ strips found at your local hardware store, just make sure the edges are square and not rounded!
Wood strips measuring 1″x1″ can be found in the dowel section of your local orange or blue hardware store.
Step 1 Understand the size and dimensions
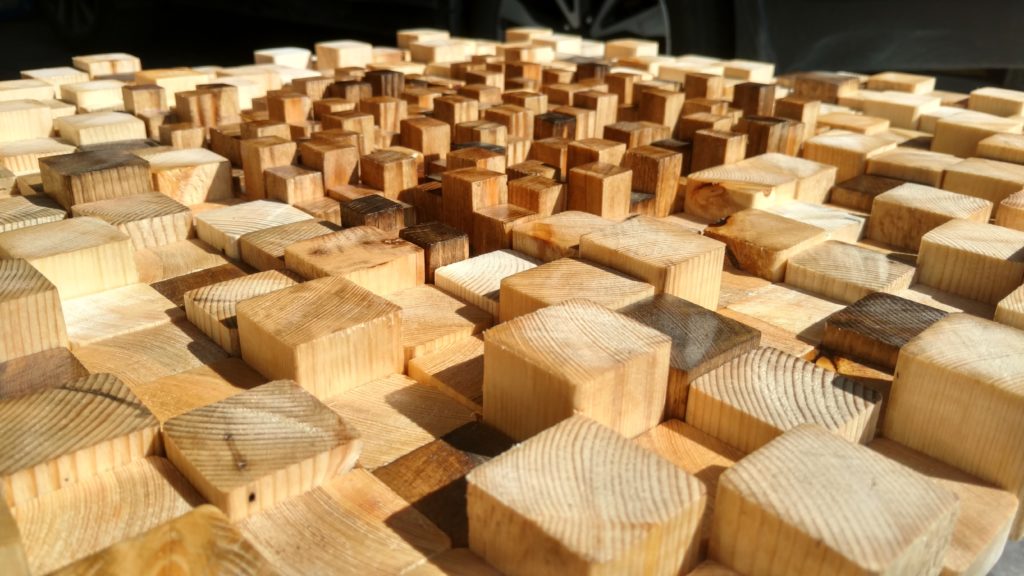
For this project, basically think of it as a bunch of 1″x1″ wooden blocks of varying lengths and glued together to form a square that reminds me of a dense “city.” Then around this “city” is a “forest” or “moat” of 2″x2″ wooden blocks of varying lengths and glued around the darker wooden square city to a depth of 5 blocks. Then around this entire piece is a frame.
Step 2 Cut, cut, and cut
I used my miter saw to cut 4 pieces of wood at once, varying the lengths from around 0.5″ to 2″.
Once I had filled a bucket with wood pieces, I took the time to line up the wood blocks to get a rough idea of what the piece was going to look like and to see how many more blocks needed to be cut.
Making your cuts may get monotonous but avoid the urge to go fast. Going slow will limit tear out which will save you time when it comes to sanding.
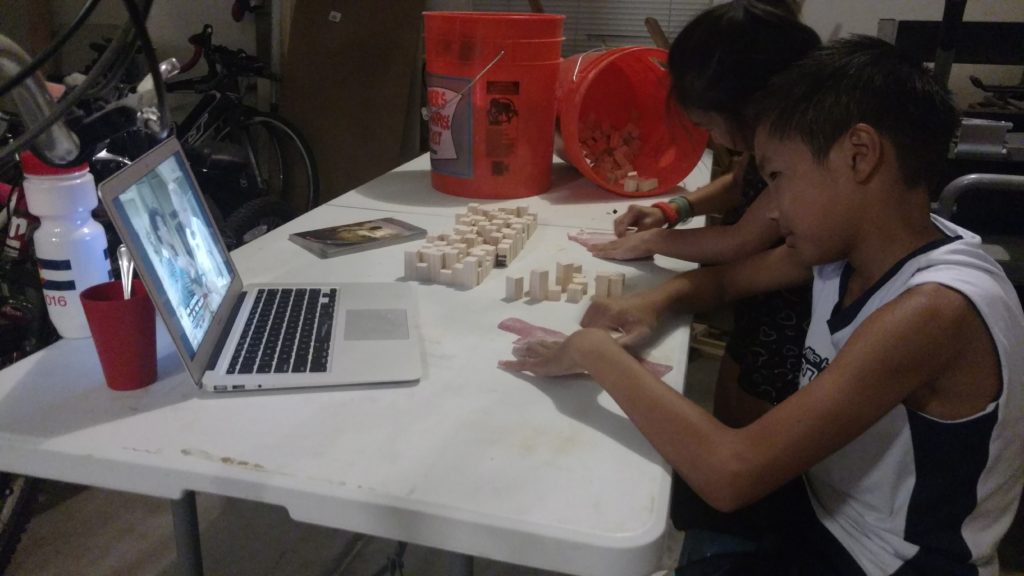
Step 3 Sand, sand, and sand
Using a power sander is a huge time saver. To save time I did not sand the bottom face of the wood block that would be glued to the plywood backing. To further save time, I recruited my kids to help me out.
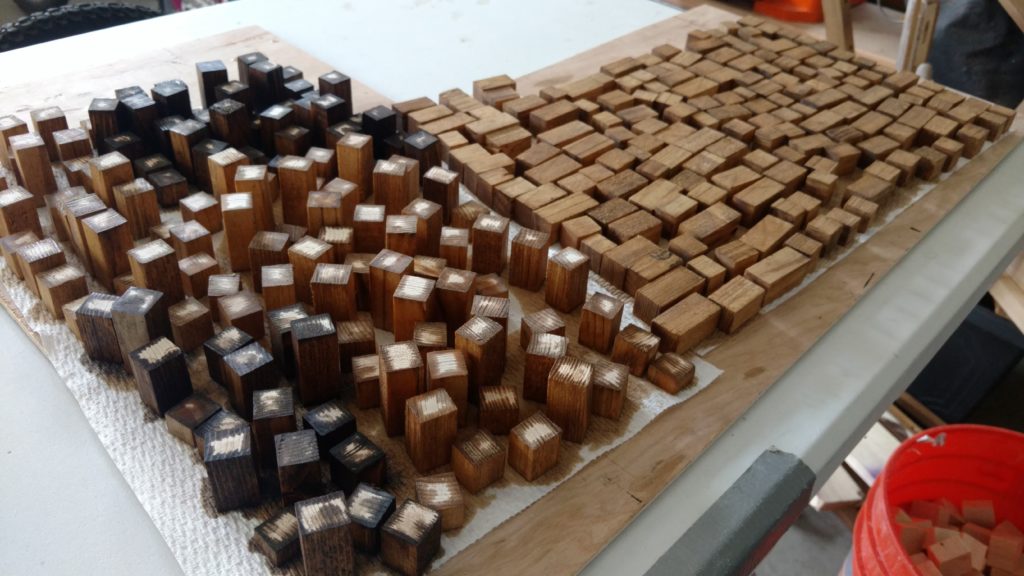
Step 4 Stain, stain, and stain
This is completely up to you. If you look at the original, it seems as if the center 1″x1″ blocks are slightly lighter that the surrounding 2″x2″ blocks.
To recreate that look, pick out a small container of wood stain and go for it. I wanted our piece to be a little darker overall so I stained the center 1″x1″ pieces using Minwax’s Dark Walnut stain and the outer 2″x2″ blocks with Minwax’s Natural stain. I also had a few random 2″ blocks stained in the darker stain to add some contrast.
We found that the best way to stain the blocks was to wear some gloves and to dip the blocks directly into the stain. We placed the stained blocks on paper towels to let them dry.
Step 4 Glue, glue, glue
I gave the stain a day to dry, then using a ruler as a straight edge I planned out how all the blocks would be set out. Once I was satisfied with the layout, I glued the blocks to each other making sure to randomize the lengths of the blocks. If you keep thinks nice and straight, the project will come out square.
My piece was a little off so I ended up running and edge through the table saw to square things up.
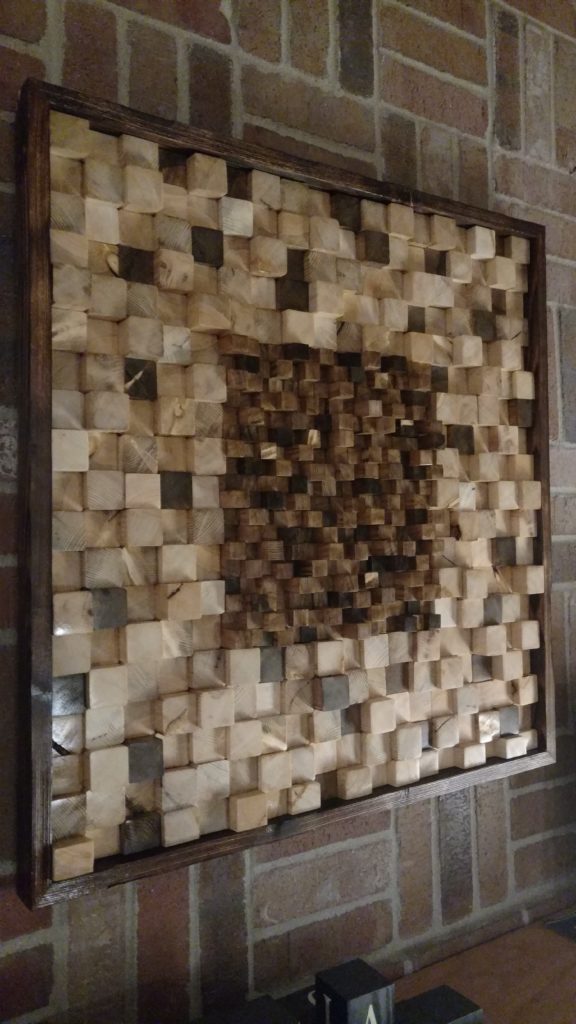
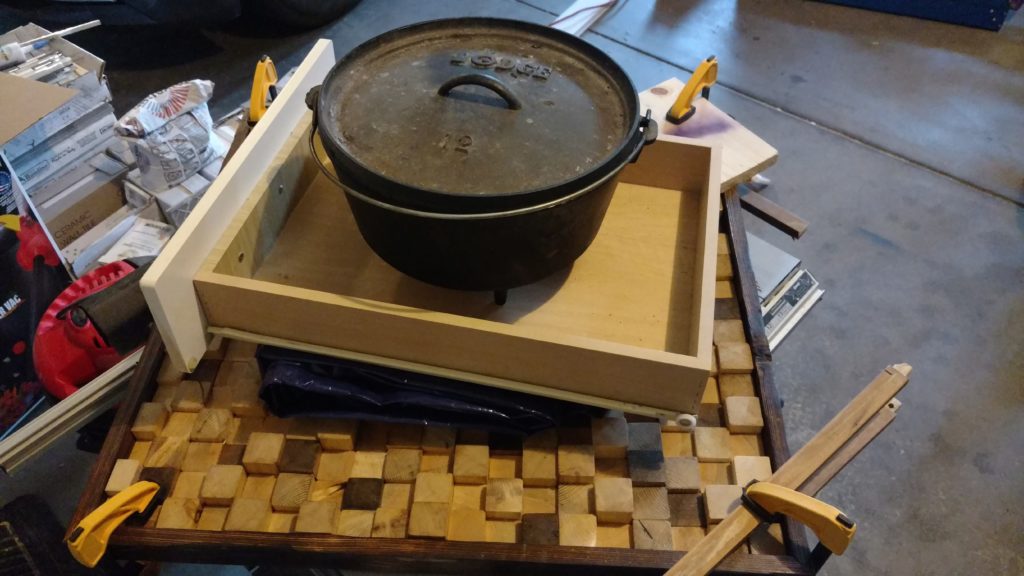
Once the piece had cured, I glued it to the plywood backing, using weights to put it all together as needed (see picture).
Step 5 Frame
I used some left over wood from the 2″x4″ wood that I ripped to make 2″x1″ wood strips for the frame. Alternatively, you could get some 2″x1″ wood at the hardware store for the frame. At this point, I couldn’t tell what type of joints were used on the original frame so I decided on miter joints however you could easily use butt joints for the frame and it would have you some time.
I measured the strips to length and then cut 45 degree angles with my miter saw to make miter joints for the frame. I glued everything together and then used strap clamps until the glue had cured.
I then attached hanging wire to the back of the piece so that we could hang it in our home.
Step 6 Finish
To finish, I found a spray on wood finish/lacquer the easiest way to get into all the nooks and crannies of the glued wood pieces. I did 3 coats to make sure there was complete and even coverage.
Step 7 Enjoy
This piece now hangs over our fireplace. I love being able to sit on my couch and enjoy the contrast in depth and color of this wood art. The wood texture helps bring a calmness to the room while reminding me of one of my favorite zombie shows.